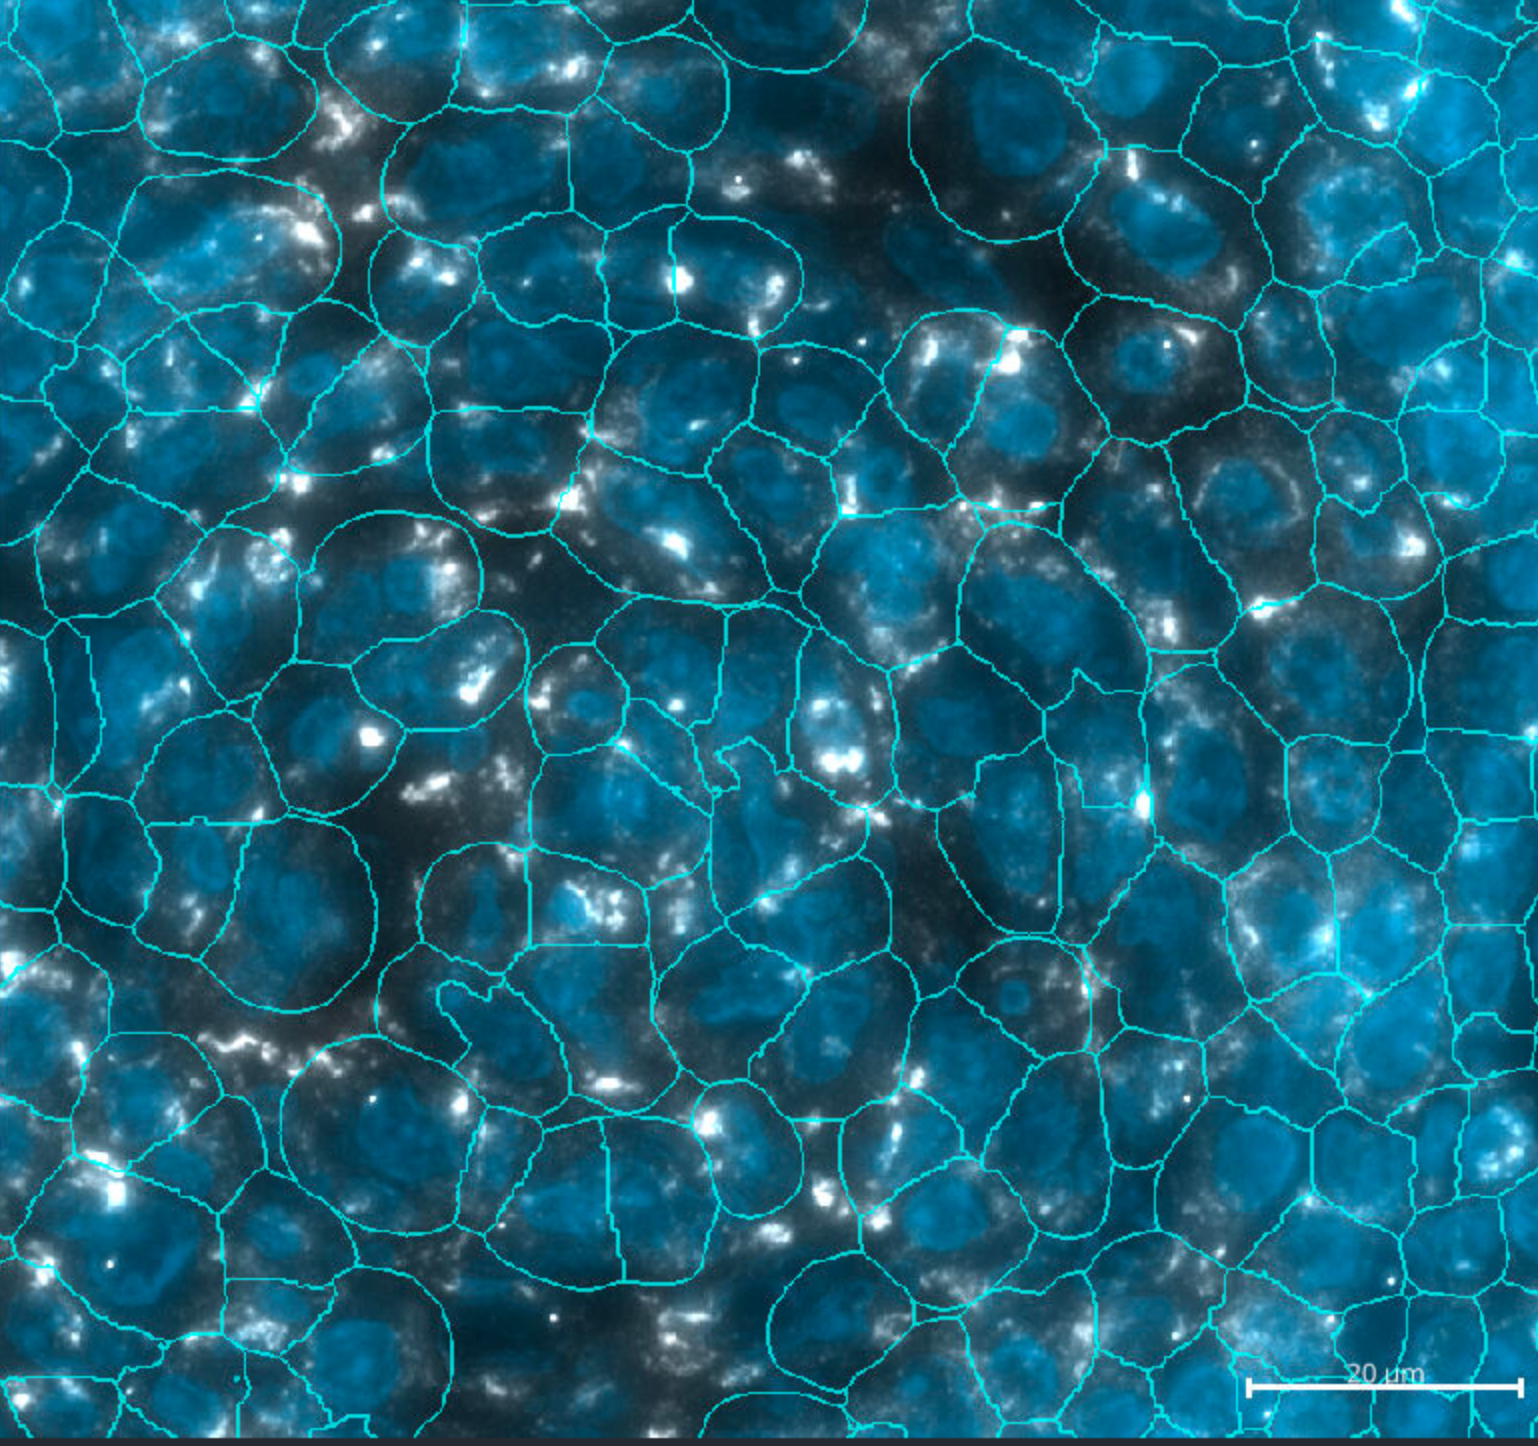
napari-cosmx plugin. Membrane = Grey; DAPI = blue, cell segementation = cyan.
Evelyn Metzger 
napari-cosmx plugin. Membrane = Grey; DAPI = blue, cell segementation = cyan.
Immunofluorescence (IF) and protein data exported from AtoMx® Spatial Informatics Platform (SIP) are provided as multi-channel TIFF files, where each field of view (FOV) is contained in a separate file. Our napari-cosmx plugin offers one method to stitch these individual TIFF files, organizing them according to their spatial location. This stitching process within napari-cosmx generates a Zarr store for each IF or protein image. For visualization of tissue microscopy data, OME-TIFF is a widely used format. The Zarr stores generated with napari-cosmx can be converted to OME-TIFF for viewing in other applications and this short blog post demonstrates how to perform this conversion.
This blog post is the fifth in our napari series. For details on generating these napari Zarr stores, refer to either the GUI-based napari-cosmx plugin introduction or the command-line tutorial on stitching.
While Napari and napari-cosmx can be installed on many systems, CosMx SMI data can be quite large. A slide with numerous FOVs may exceed the capabilities of a standard laptop.
napari-cosmx is actively and continuously under development in the RnD groups at Bruker Spatial Biology. We do not (yet) have the source code for napari-cosmx opened-source. Please be aware that there may be bugs and that it has not gone through the regular level of quality and testing. Our goal here is to bring the capabilities of napari to CosMx SMI users as fast as possible.
This tutorial uses version 0.4.17.3 of the napari-cosmx plugin. This version is available as a whl file in the assets folder of the Scratch Space repository.
It is encouraged to use a virtual environment for these steps as there can be conflicting package and Python versions and this script has not been installed nor tested on all configurations. The example below used Python 3.9.13 within pyenv. In general, it is recommended to use Python > 3.8 and Python < 3.11 for the napari-cosmx plugin as newer versions of napari are not yet integrated into the plugin.
Assuming you have a pyenv virtual environment named napari_env:
# terminal
pyenv activate napari_env
pip install "napari[all]"

# Optional use wget to download whl file directly.
# wget https://github.com/Nanostring-Biostats/CosMx-Analysis-Scratch-Space/raw/refs/heads/Main/assets/napari-cosmx%20releases/napari_CosMx-0.4.17.3-py3-none-any.whl

pip install /path/to/your/whl/file
You can confirm that the install worked with pip freeze or by directly accessing the package script:
which export-tiffwhich should return the path to export-tiff.
For windows, pyenv-win and pyenv-win-venv may be a good option but this has not been extensively tested.
Assuming you have a pyenv-venv virtual environment named napari_env:
# terminal
pyenv-venv activate napari_env
pip install "napari[all]"

pip install /path/to/your/whl/fileFor help, type export-tiff --help in your terminal (unix/macOS) or PowerShell (Windows).
export-tiff --helpusage: export-tiff [-h] [-i INPUTDIR] [-o OUTPUTDIR] [--filename FILENAME] [--compression COMPRESSION] [-b BATCHSIZE]
[-s] [-c [CHANNELS ...]] [-p [PROTEINS ...]] [--levels LEVELS] [-v] [--libvips]
[--vipshome VIPSHOME] [--vipsconcurrency VIPSCONCURRENCY]
Export stitched Zarr to OME-TIFF
optional arguments:
-h, --help show this help message and exit
-i INPUTDIR, --inputdir INPUTDIR
Required: Path to existing stitched output.
-o OUTPUTDIR, --outputdir OUTPUTDIR
Required: Path to write OME-TIFF file.
--filename FILENAME Name for OME-TIFF file, use ome.tif extension.
--compression COMPRESSION
Passed to TiffWriter, default is 'zlib'. Other options include 'lzma' (smallest), 'lzw', and
'none'
-b BATCHSIZE, --batchsize BATCHSIZE
Required: the number of elements to put into each ome-tiff file. Recommended = 5 or fewer.
-s, --segmentation Optional: Create TIFF for segmentation mask.
-c [CHANNELS ...], --channels [CHANNELS ...]
Optional: Output only specific morphology channels
-p [PROTEINS ...], --proteins [PROTEINS ...]
Optional: Output only specific proteins
--levels LEVELS Optional: Specify number of pyramid levels.
-v, --verbose Print verbose output?
--libvips Optional: Use libvips to create pyramidal image, will be slower but more memory-efficient.
--vipshome VIPSHOME Optional: Path to vips binaries. Required in Windows if vips and associated DLLs are not in
PATH
--vipsconcurrency VIPSCONCURRENCY
Optional: Specify number of threads for vips.Since CosMx SMI data with hundreds of FOVs can be large (e.g., >50 GBs for RNA and larger still for protein data), the --batchsize flag can be used to create batches of smaller OME-TIFF files. The --batchsize flag specifies the upper limit of the number of channels/proteins that are included in a given OME-TIFF. For example, if --batchsize was set to 5, and -c (channels) was also selected, the OME-TIFF file would include all five IF channels.
Note that the segmentation (-s) layer does not count toward the batch size. In other words, if selecting -b 5 -c -s, the resulting OME-TIFF file will include the cell borders and the five channels.
If you would like to generate an OME-TIFF file with only DNA, GFAP, and proteins Amyloid-Beta-1-40 and Phospho-Tau-S199, with cell borders:
export-tiff -i /path/to/images/folder -o /path/to/output/folder -s -c DNA,GFAP -p Amyloid-Beta-1-40,Phospho-Tau-S199Let’s test this script with an example. Here I used the Human Lymph Node FFPE dataset napari files that are publicly available. This dataset has a scan area of 104 \(mm^2\), 400 FOVs, and ~1.8M cells. I am using an AWS r5b.8xlarge EC2 instance (32 vCPUs, 256 GB RAM) running Linux (Amazon Linux 2).
Navigate to the location of napari.zip and unzip it.
# Terminal
unzip napari.zip
To convert all the channels and the cell segmentation boundaries:
# Terminal
# TIME="%e %U %S" time export-tiff -i ./napari -o output -s -c -b 5
export-tiff -i ./napari -o output -s -c -b 5
5352.18 50467.38 11061.83 10366568
This script converted a single OME-TIFF file in just under 1.5 hours (5352/3600 = 1.49).
The size of the OME-TIFF file, which contains five IF channels plus the segmentation layer, is 54 GBs (i.e., about 91% of the size of the Zarr stores).
The default method to convert Zarr to OME-TIFF can require more memory than your system has. If you run into memory issues, you can try the secondary method that uses pyvips (see Appendix).
The export-tiff utility script runs in two different modes. The first one (default) is generally the quicker of the two. However, if you are running into memory issues, you can try the second option that is memory-optimized but runs slower and requires more disk space.
For macOS, I have had success with using brew following libvips’ recommendation.
For Linux, be sure that the appropriate libraries are installed for your distribution. Check out libvips’ github wiki for more tips.
Download and install vips-dev-w64-all-8.16.0.zip from here
Unzip it and move its contents to your desired location. Add the folder to a convenient location and add the location of the binaries (e.g., C:\vips-dev-8.16.0\bin) to your Path. Restart your computer.
When using the --libvips flag within the export-tiff package script, python will look for these binaries.
--libvipsRerunning the previous Lymph Node example with --libvips:
# Terminal
# TIME="%e %U %S" time export-tiff -i ./napari -o output -s -c -b 5
export-tiff -i ./napari -o output -s -c -b 5 --libvips
16894.29 16987.47 438.18 16905396
or about 4.6 hours.